Thursday, August 20, 2015
Friday, August 14, 2015
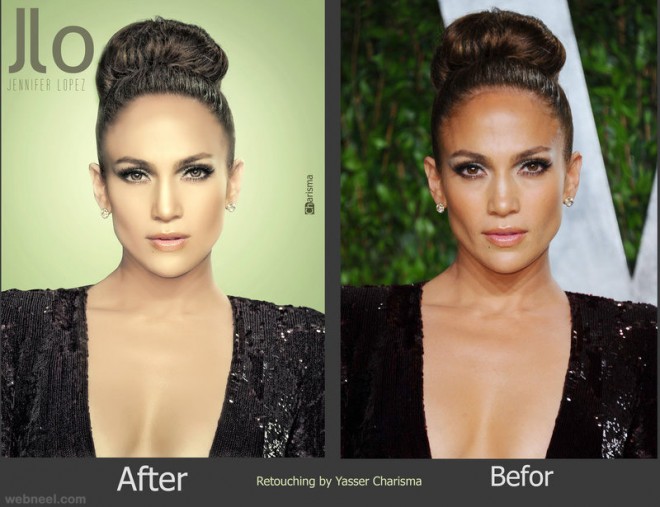
25 Best photograph Retouching Masterpieces and Tips for Designers
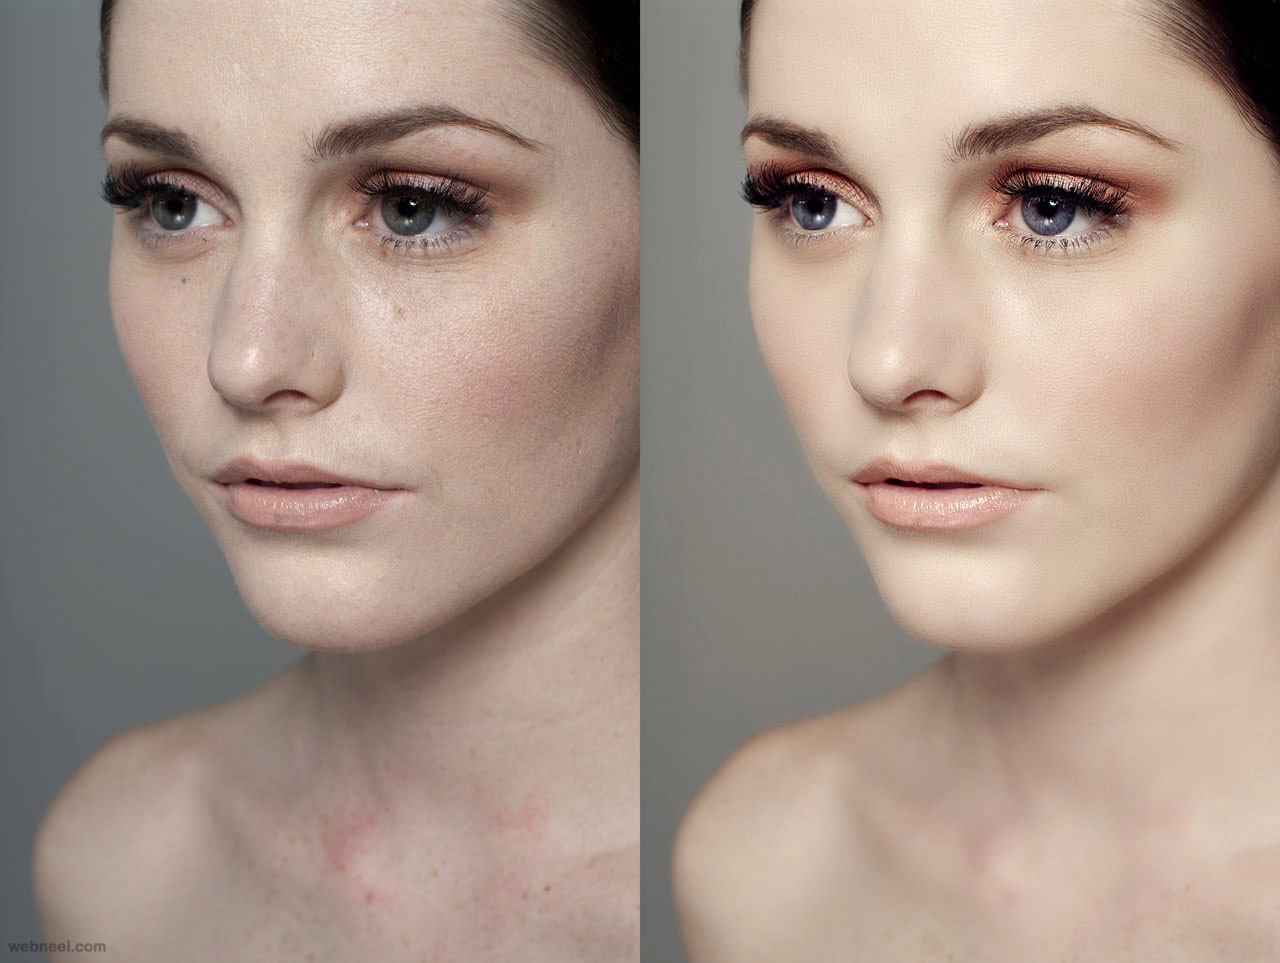
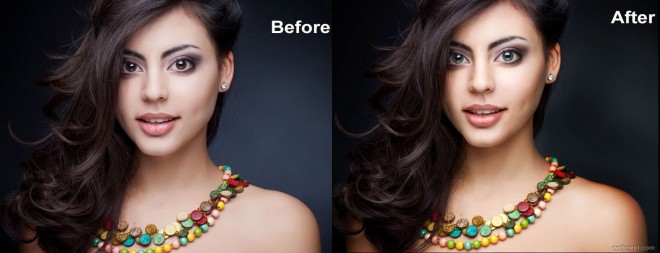
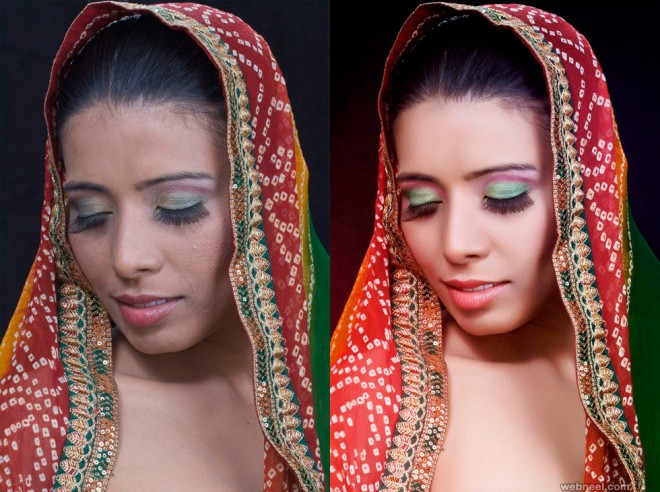
Photo Retouching : If you wish to feature glow impact on the bride’s
face in her wedding images, or need to create a standard face to
additional engaging by removing dots or wrinkles, Photoshop could be a
wide used tool for ikon retouching works. Photoshop is understood as
best remedy for giving a recent look to associate previous or boring
images. i hope you\'ll like these ikon retouching works.


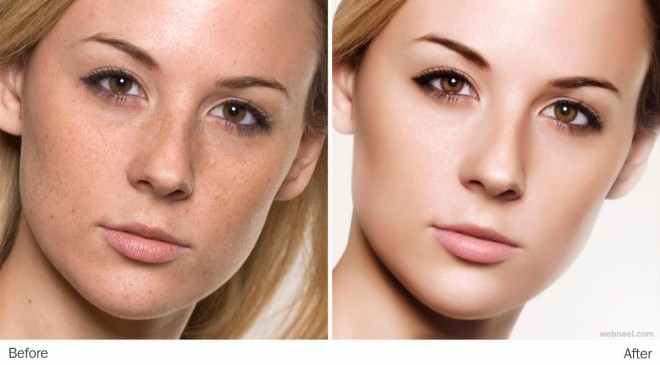
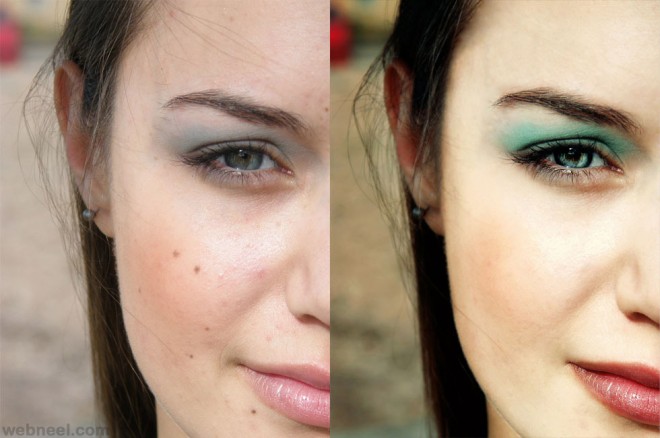
8 simple steps for photo retouching image :
1. To start, get eliminate the apparent blemishes. The healing tool is intended with this in mind. merely hold elevation and click on a clean spot of skin (change the comb size initial, if necessary) and so click the imperfectness. Repeat on all unwanted spots.2. take away the yellow teeth. choose the teeth with one among the lasso tools and paste into a replacement layer. Masking helps if you decide on an excessive amount of of the world and wish to erase elements of the gums/lips. Use the selective color adjustment to get rid of yellow.
3. Use the blur tool to even out skin tone. Use the blur tool and paint over the skin, ensuring to not re-examine outstanding elements of the face, just like the eyes or hair.
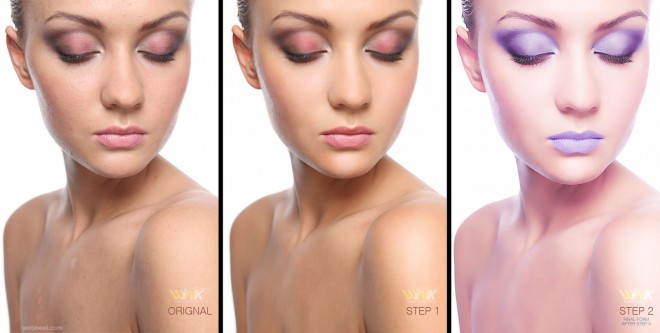
4. offer the skin a healthy color, once more use the selective color adjustment and play with the red tones. this may facilitate get eliminate unnatural skin tones. you\'ll additionally boost the saturation of the complete exposure to provide it a additional vivid look. Click ctrl-U (or command-U on a mac) to observe the Hue/Saturation adjustment window.
5. Sharpen key areas, this may facilitate bring the person additional to life. Hair, eyes, noses etc usually look higher with accessorial sharpness. However, don\'t use an excessive amount of or it\'ll look coarse-grained. you\'ll sharpen the image by selection victimization the sharpen tool and ever-changing the comb size.
6. Use the diffuse filter (Filter>Stylize>Diffuse...) helps even out options and provides the person a \"softer\" look. Run the filter and fade it to 40-50%. this may provides it that soft glamour shot look.
7. Duplicate the layer (Layer>Duplicate Layer) and so totally desaturate it (Shift-Ctrl-U). Set the mixing choice (found within the upper-left-hand corner of the layers palette) of the desaturated layer to \"overlay\". Next experiment with the Gaussian blur filter (Filter>Blur>GaussianBlur...) as desired (A pixel-width of 3-5 ought to work). this may build most photos even softer look, whereas maintaining their sharpness.
8. Use the sharpen filter if the image appearance to a small degree too soft or use the sharpen brush to accent uninteresting areas.
Subscribe to:
Comments
(
Atom
)